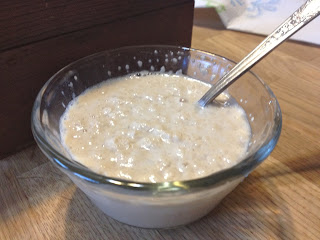
Tuesday, December 10, 2013

Turkey or Chicken Pot Pie

Using the turkey leftovers is the most fun part of having turkey for Thanksgiving. 


Turkey or Chicken Pot Pie
8 cups chopped vegetables:
·         2 medium russet potatoes, peeled and cubed

·         4 ribs celery, stringed and thinly sliced

·         4 carrots, thinly sliced

·         1 medium onion, chopped

·         3 cloves garlic, minced
4 cups liquid (chicken or turkey broth, vegetable broth, water, or a combination of any of these)
2 cups frozen green peas, defrosted and drained

4 cups cooked, chopped turkey or chicken
¼ cup butter
½ cup all-purpose flour
Milk (approximately 1 cup)
Salt and pepper to taste
Pastry for 2 double crust pies
Place single pastry into two 9 inch pie plates or one 9x13 inch casserole; reserve remaining pastry for top crust.
The bottom crust in this case was pieced together, utilizing pastry from a previous endeavor.

In a medium saucepan, place 4 cups liquid and the 8 cups chopped vegetables; bring to a boil and reduce heat.  Simmer vegetables until tender, approximately 30 minutes. 
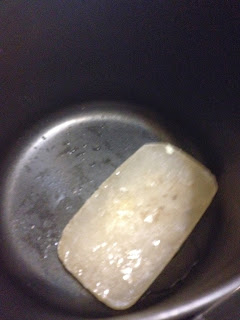
I started with approximately 1 cup frozen chicken broth and added 3 cups water for cooking vegetables.
 Drain cooking liquid into a 4 cup measuring cup and set liquid aside.  Some of the liquid will have evaporated, yielding about 3 cups liquid.

Combine cooked vegetables, green peas, and turkey or chicken in a large bowl, set aside.
To prepare gravy:  Add milk to vegetable cooking liquid to equal 4 cups.  In the same saucepan in which vegetables were cooked, melt ¼ cup butter (1/2 stick).  Using a whisk, add flour to melted butter and mix until all flour is coated in fat.  Add liquid to fat/flour mixture and whisk well.  On medium heat, cook and stir until mixture is thickened and has just reached the boiling point.  Remove from heat; season with salt and pepper to taste.
Add milk to cooking liquid to equal 4 cups.

Pour gravy over turkey/vegetable mixture and stir gently.  Pour all into prepared pie plates or casserole; top with remaining pastry.  Bake at 350°F for 30 minutes or until pastry is browned evenly.


Monday, December 2, 2013

Refrigerator Rolls

This recipe came from my Aunt Mildred, who got it from a friend.  My aunt was one of the best cooks I have known; she always baked her rolls in muffin tins.  I tweaked it a bit to add water temperatures and mixing instructions.

Light and tender rolls! 

Refrigerator Rolls
½ cup warm tap water, 110° to 115°F

2 packages (4-1/2 teaspoons) active dry yeast

¾ cup melted butter or margarine
¾ cup sugar

2 teaspoons salt
2 eggs

2 cups warm tap water, 110° to 115°F
7 cups all-purpose flour (more or less)

In a small bowl, dissolve yeast in warm tap water.  Use a food thermometer to make sure the water is within the recommended temperature range so that the yeast will be able to do its job.  Set yeast mixture aside.
The water temperature for dissolving yeast should be 110 to 115 degrees F.
In a large microwave-proof bowl, melt butter.  Add sugar, salt, and eggs; beat well with a whisk.  Add 2 cups warm tap water (again, make sure the temperature is correct) to this mixture, along with the dissolved yeast mixture.  Beat well with a whisk.  Add 2 cups flour and beat well.  Add remaining flour, about 2 cups at a time, stirring with a sturdy spoon.  Continue adding flour  until the dough is stiff and sticky. 
Dough should be stiff but not dry.

Cover bowl and refrigerate dough overnight; it may be stored up to one week.

When dough is removed from the refrigerator, it will be light and spongy.
Remove dough from refrigerator and turn onto floured board.  Knead in additional flour until the dough is not sticky.   Shape rolls as desired. 

High tech biscuit cutter, about 2.5 inches in diameter.


Roll dough to 1/2 inch thickness.

Placed in greased muffin tins or in greased pans. 
Leave a bit of space between rolls to allow for rising.
Let rise until doubled in bulk, approximately 2 hours. Preheat oven to 350°F.  Bake rolls 22-28 minutes or until lightly browned.  Baking time will be influenced by the thickness of the rolls and variations in oven performance.

Variations:  Sometimes I use cooking oil rather than butter; you can reduce the oil and sugar to 1/2 cup each, if you like a less sweet and rich roll.  Brushing the rolls with melted butter immediately after removing them from the oven will make them extra yummy.

Friday, November 29, 2013

Sweet Potato Pie

This is a result of a 2013 Thanksgiving baking frenzy; it is easy to make and very tasty. 


Sweet Potato Pie
1 unbaked 9 inch pie crust
2 cups cooked, mashed sweet potatoes, without skins

½ cup sugar
½ cup firmly packed brown sugar

2 eggs

¼ cup melted butter
½ cup buttermilk

1 teaspoon vanilla
1 teaspoon grated nutmeg

Preheat oven to 375°F.  Mix sweet potato, sugars, eggs, buttermilk, butter, vanilla, and nutmeg with a whisk or mixer.  Pour mixture into prepared pastry. 

Add all ingredients to a bowl and mix; pretty simple!

Unbaked 9 inch pie crust.
 
Ready for the oven.

Bake for approximately 1 hour and 15 minutes or until a knife inserted in the center of the crust comes out clean.  Serves 8.

Wednesday, November 27, 2013

Split Pea Soup

This recipe makes a boatload of soup; halve the recipe if you like.  It freezes well; soup in the freezer is like money in the bank. 
 
Split Pea Soup
2 cups chopped onion
1 tablespoon minced garlic
2 tablespoons olive oil
8 cups chopped vegetables:
·         1 bunch carrots, thinly sliced
·         1 bunch celery, stringed and thinly sliced
·         1 large potato, peeled and cubed
2 lbs. dry split peas, rinsed
4 cups chopped, cooked ham
1 ham bone
1 gallon water
1 teaspoon salt
1 teaspoon pepper

Sauté chopped onions and minced garlic in olive oil.  Add remaining ingredients and bring to a boil; cover and reduce heat, simmering until split peas and vegetables are tender and soup is thick, about two hours.  Adjust salt and pepper to taste.   

Saturday, November 16, 2013

Butterscotch Ice Box Cookies

Baked and ready to dunk in a good cup of coffee.

My maternal grandmother always had ice-box cookies baked and ready to serve.  My skinny grandfather slathered butter on his cookies, and the grandkids enjoyed them for snacks.  Before we knew about Salmonella and recognized that eating raw eggs was a bad idea, she always kept a bit of leftover dough for the grandkids to eat raw, straight from the refrigerator. This recipe was always referred to as "Stella's cookies" because my grandmother got the recipe from her sister, Stella.  Why does it call for 6 teaspoons baking powder?  Who know, it doesn’t make sense to me, but that’s what the recipe calls for, and the cookies turn out just fine.

Butterscotch Ice Box Cookies
2 cups light brown sugar
¾ cup butter, softened
2 eggs
1 teaspoon vanilla
3-1/2 cups all-purpose flour
6 teaspoons baking powder
1 cup finely chopped pecans
½ teaspoon salt (optional)
Sift flour and baking powder and set aside.  In a large bowl, cream brown sugar and butter.  Add eggs and vanilla and mix well.  Stir in the flour mixture; I use the electric mixer on low to do the preliminary mixing.  Add pecans, then mix by hand until the dough is well blended and pliable, resembling the texture of Play-Doh. 
Smooth ball of cookie dough.
Divide the dough into roughly three portions.  Tear off three sheets of waxed paper, each about 15 inches long.  Working one at a time, dust each piece of waxed paper with about a tablespoon of flour, then place a third of the dough on the sheet.  Use your hands to roll the dough into a cylinder, about 1.25 inches thick. 
About a third of the dough.


Wrap the waxed paper around the roll, tucking in ends.  Repeat for each section of dough.  If the cookies are to be baked within a few days, place the dough in the refrigerator and use as needed.  Otherwise, wrap each roll additionally with foil, label and freeze.
Shaped roll of cookie dough.
Wrap rolls in waxed paper.

Wrap again in foil; label, date, and freeze.
 

To bake the cookies, preheat the oven to 375°F.  Slice dough into pieces about 3/8 inch in thickness; place on greased cookie sheet and bake for 12 to 14 minutes or until lightly browned.

Sunday, October 20, 2013

Veggie Green Chile Stew


This recipe is not by any means a copy of the Veggie Green Chile Stew served at Eske’s Brew Pub in Taos, New Mexico; rather, it is inspired by Eske’s very delicious dish.  Eske’s serves their green chile stew with ground turkey or without.  Making a green chile stew with vegetables only lends itself to the addition of ground beef, ground turkey, leftover chicken, etc. 
HEB Grocery stores in Central Texas sell hatch green chiles once a year, and I roasted a couple of batches, freezing them for later use.  Canned green chiles can be used instead of the roasted ones. 


1 medium onion, chopped
4 cloves garlic, minced
1 small jalapeno, seeded and finely chopped
2 tablespoons olive oil
8 cups chicken broth (or vegetable broth, if preferred)
2 medium size russet potatoes, unpeeled, cubed
4 carrots, thinly sliced
3 ribs celery, thinly sliced
1 cup roasted green chiles, chopped
Kernels from 2 ears of fresh corn
1 tablespoon cumin
½ teaspoon chili powder
1 teaspoon salt
Sauté onion, garlic, and jalapeno in olive oil.  Add chicken broth, vegetables, and seasonings.  Cook until vegetables are tender, about an hour or so.  Adjust cumin, chili powder, and salt to suit your taste.  To make a creamy stew, give it a couple of passes with an immersion blender, just enough to pulverize some of the vegetables. 

Friday, September 20, 2013

Marilyn's Meat Loaf

Ready to serve.

Meat loaf is high on my list of comfort foods; it was a staple in my home when I was growing up, and it was served once a week in the school lunch room.  Everyone has their own standards for flavor, texture, and appearance by which meat loaf should be judged.  It is a dish that lends itself to creativity and experimentation, and I will confess that I usually do not measure when making meat loaf.

The meat loaf that I grew up with was significantly different than the one I make today.  Lean ground beef wasn’t readily available; we just bought hamburger meat, which was reasonably fatty ground beef.  My mother didn’t like onions or tomato sauce, making our meat loaf quite bland.  She used saltine crackers as a binder; I prefer oatmeal.  My mother’s meat loaf had one tasty feature that doesn’t really go along with today’s emphasis on cutting fat in the diet:  she made a lattice of raw bacon strips on top of the meatloaf, securing the ends with toothpicks.  Talk about a moist meat loaf!  Of course, the bacon ended up nice and crispy and delicious when the meatloaf was done.
Must have whole kernel corn with meat loaf!
The school lunch room introduced me to a spicier meat loaf; it was always served with whole kernel corn.  I like to add extra veggies to meat loaf to boost the fiber content, flavor, and texture.

How do you know when a meat loaf is done?  Probe it!  The USDA recommends that ground meat mixtures be cooked to a minimum temperature of 160°F.

Marilyn’s Meat Loaf

1.75 to 2 pounds lean ground beef (90/10)
1 medium onion, finely chopped
1 green pepper, finely chopped

1 (8 oz.) package mushrooms, finely chopped

3 cloves garlic, minced
2 large eggs
1 (8 oz.) can tomato sauce, no salt added

1 cup oatmeal

1/3 cup tomato ketchup

Preheat oven to 350 degrees.  Line a baking pan with foil.
My mother's meat loaf pan - battered but trustworthy!
Thoroughly mix all ingredients except for ketchup.  Shape into a loaf and place on a rack in prepared pan.  Bake until the meat loaf reaches a minimum temperature of 160°F, approximately 1 hour and 30 minutes.  Cool slightly, then brush with ketchup.  Serves 8 to 10.

Ready to bake.
Be sure to use a food thermometer to determine doneness.

Modifications for smaller meat loaf (1 to 1.5 lbs. ground beef):  use a little less of the vegetables and garlic; use 1 egg and 1 (8 oz.) can tomato sauce; use ½ cup oatmeal, or a little more.  Baking time will be about an hour; be sure to probe to determine doneness!


Wednesday, July 24, 2013

Mustardy Mashed Potato Salad


Being a fan of potatoes prepared just about any way imaginable, I make several different kinds of potato salad.  This version is pretty close to the potato salad I grew up with.  The potatoes were always mashed, not cubed.  I was in high school before I ever saw potato salad made from cubed potatoes; it was shocking!  My mother often made potato salad from leftover mashed potatoes. 
I rarely measure when making this kind of potato salad, but I tried to measure just this once and write down the formula.  In my previous career, I made huge tubs of potato salad from time to time, without measuring.  Please take the following recipe as a place to start with potato salad experimentation.  The amount of relish, pimientos, mustard, salt, pepper, and salad dressing depends a lot on personal preference.  I don’t really care for boiled eggs in potato salad, but I included them this time because my mama always put some in the potato salad.  She didn’t put onions in hers, but I like onions.  Some people might prefer sweet relish to dill relish.  I don't add extra salt; the mustard, salad, dressing, and relish make the potato salad salty enough for my taste.

Peeling potatoes seems like a waste of time and fiber and nutrients; I like to use gold potatoes to avoid peeling.  The skins are very tender and cannot be detected in the finished product.  If you like to peel potatoes, go for it; I do peel the potatoes if using russets.  The amounts of relish, mustard, and salad dressing might need to be decreased if you peel potatoes because the yield of cooked potatoes will be less than with unpeeled potatoes.

Mustardy Mashed Potato Salad

3.5 lbs. Yukon gold potatoes

2 hard cooked eggs, coarsely grated
1 (4 oz.) jar chopped pimientos, drained
1 cup finely chopped red onion
2/3 cup dill pickle relish
3 tablespoons mustard
1 cup Miracle Whip salad dressing
Salt and pepper to taste
Paprika to garnish
Wash potatoes, cut into large chunks, and place in 4 quart saucepan.  Add water to a depth of about an inch.  Cover and cook on high heat until boiling.  Reduce heat and cook, still covered, until potatoes reach desired tenderness.  Drain, reserving cooking liquid.  Using a potato masher, mash potatoes, adding cooking liquid as needed.  Add boiled eggs, pimientos, onion, pickle relish, mustard, and salad dressing.  Stir gently.  Add additional salad dressing to reach desired consistency.  Season with salt and pepper to taste.  Place in 2 quart bowl or dish, dust with paprika, and chill for several hours before serving to allow flavors to blend.  Serves 8.

Friday, July 12, 2013

Peach Cobbler

Peach Cobbler with Ice Cream!


As someone who regularly tracks calories and activity, (check out MyFitnessPal, http://www.myfitnesspal.com/), I try not to spend calories on foods that are low in nutrient density; excessively high in fat, sugar, or salt;  and/or not to my liking.  For example, foods that I used to enjoy that I now deem “not worth the calories” include corn dogs, gas station pizza, Swanson chicken pot pies, Vienna sausage, and other assorted forms of junk food.  Other popular foods that I deem “not worth the calories” include funnel cakes, cream cheese frosting, cotton candy, and regular sodas.  However, some foods that are not great in the nutrient density department or which are high in fat, sugar, and/or sodium are “worth the calories” to me on occasion.  This list includes but is not limited to Mexican food, Thai food, chicken fried steak with gravy and mashed potatoes, pecan pie, brownies, pound cake, frosted chocolate sheet cake, peach cobbler, and ice cream.
There is nothing “low test” about this classic peach cobbler.  If you want a really healthy dessert, eat a peach.  If you want to spurge occasionally on a really good dessert, go for the real thing!

Peach Cobbler
Preheat oven to 400°F.  Spray a 2 quart casserole with pan spray.

Filling:
8 cups peeled, sliced peaches (about 3 lbs. peaches)
1-1/2 cups sugar
¼ cup water (or less, or none at all)
1 tablespoon butter
2 tablespoons cornstarch (or none at all)
1 tablespoon sugar
Dash cinnamon

Pastry:
3 cups flour
½ teaspoon salt
1 cup shortening
8 tablespoons water

To make pastry, add salt to flour.  Using a pastry blender, cut the shortening into the flour until the fat is evenly dispersed, with pieces of fat/flour about the size of split peas.  Toss cool tap water into the flour/fat mixture and stir until the dough forms a ball; I always have to use my hands at this point.  Split dough into four equal balls.  On a floured surface, roll each ball into a thin sheet of dough.  Place a whole sheet of dough in bottom of 2 quart baking dish.  Cut other portions of dough into long strips, about 1 inch wide; set aside.
Save longest strips for lattice top crust.

Use shorter or imperfect strips for interior layers that don't show.

To prepare filling, peel peaches and slice into reasonably large chunks.  Place peaches in a heavy saucepan with sugar and water.  If the peaches are juicy, omit or decrease the water; the purpose of the water is to keep the peaches from sticking to the bottom of the pan until juice forms.  Cook peaches and sugar mixture on low heat about half an hour or until peaches are tender but not mushy.  If the mixture looks too watery, remove a small amount of liquid, let it cool, and stir cornstarch into liquid until all cornstarch lumps are dissolved.  Pour cornstarch mixture through a strainer into the pan with peaches; cook just until juice is thickened.  Remove peaches from heat and begin layering the cobbler.

Four layers crust, three layers peaches.

Ladle one third of the peaches on the prepared bottom crust; add a few bits of butter; and place some strips of pastry on top of peaches.  Repeat with one third of peaches, strips of pastry, and a little butter.  Pour remaining peaches on top of the existing layers. 
Hint:  start in the middle when creating lattice. 
 
 
Carefully arrange pastry strips on top of the cobbler in a lattice structure.  After completing lattice, trim ends of pastry strips even with dish.


Brush pastry with a bit of milk; sprinkle with sugar, about 1 tablespoon; and lightly dust with cinnamon.  
Milk and sugar on top of pastry helps with browning.
  Bake for 35 minutes or until crust is golden brown. 
The finished product.